General Ingredients:
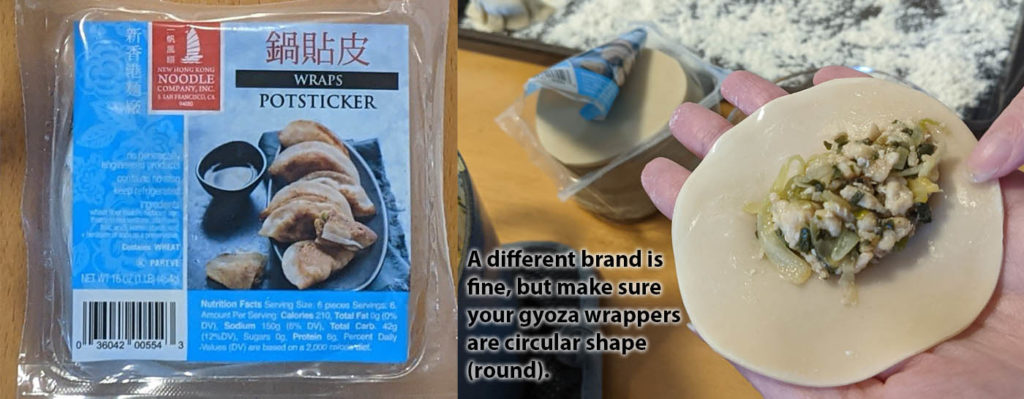
- Gyoza Wrappers (1 package – get ROUND wrappers, not the square kind)
- Flour (approx 3 tablespoons – for sprinkling on the tray you put the uncooked gyoza on)
- Sesame Oil (for cooking)
- Vegetable Oil (for cooking and filling)
- (filling – ingredients below)
Filling Ingredients:
- 1 teaspoon Vegetable Oil
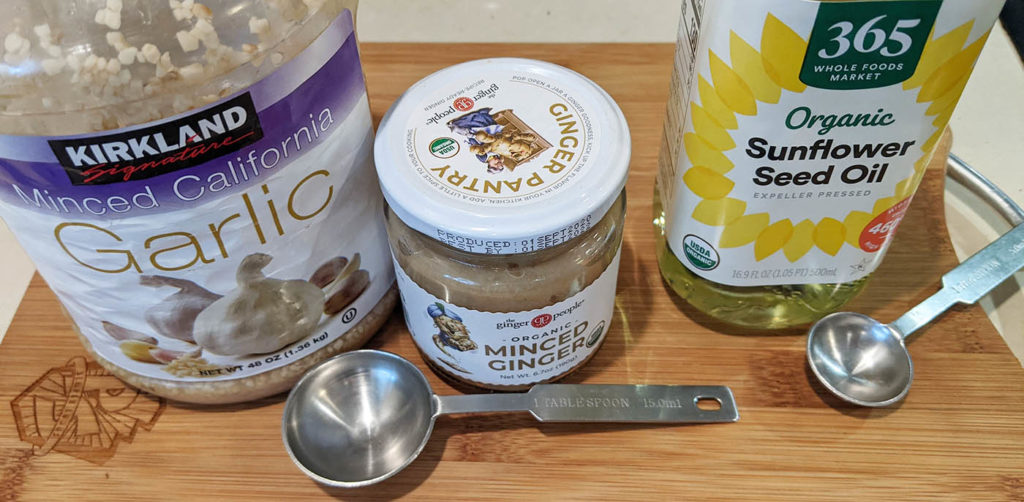
- 1 Tablespoon Diced/Minced/Crushed Garlic Paste (not powdered)
- 1 Tablespoon Minced/Crushed Ginger Paste (not powdered)
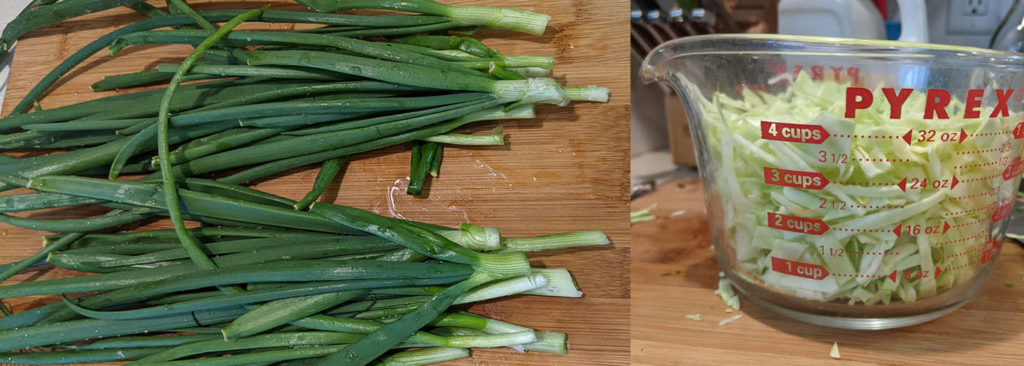
- 2 Bunches Green Onions (fresh)
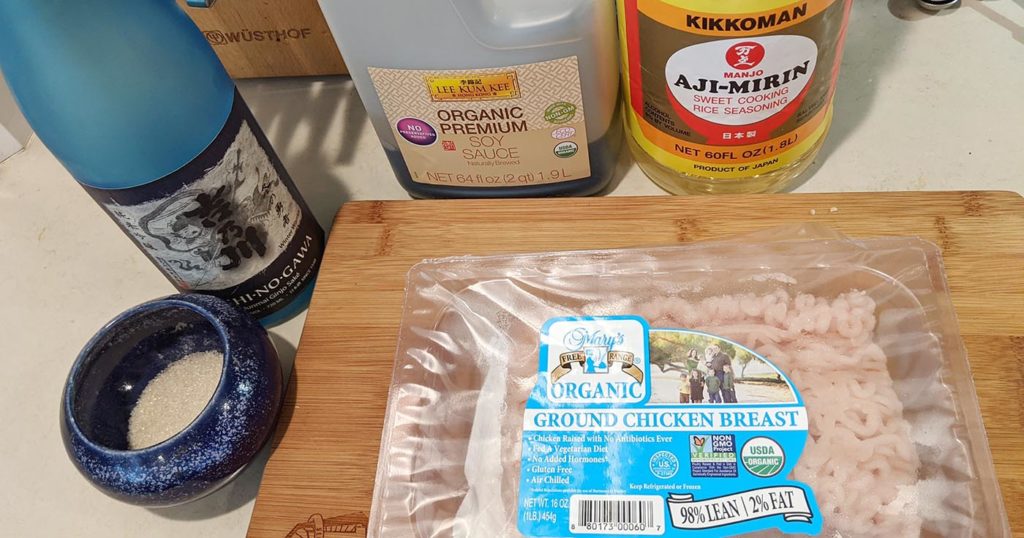
- 1 Package Ground Chicken (16oz) (substitute 1 package of Impossible ground “beef” if you want to make a vegetarian version, but this will have a heavier flavor than chicken would)
- 1 teaspoon Mirin (substitute 1/2 teaspoon sugar if you don’t have this)
- 1 teaspoon Sugar
- 1 teaspoon Soy Sauce
- 1 teaspoon Sake (can substitute rice vinegar, or white wine, or leave out entirely)
- 4 cups chopped/diced Cabbage (green preferred, purple okay)
- 1 Tablespoon flour
Photos of Ingredients:
Making the Filling
- Add vegetable oil, garlic, and ginger to the bottom of a medium pot, start it warming on medium heat.
- As it starts to warm up, add the diced green onions and the ground chicken. Stir.
- Add mirin, sugar, soy sauce, and sake. Stir more.
- Cook on medium heat for around 7 minutes, until the green onions are looking wilted and ground chicken is mostly cooked.
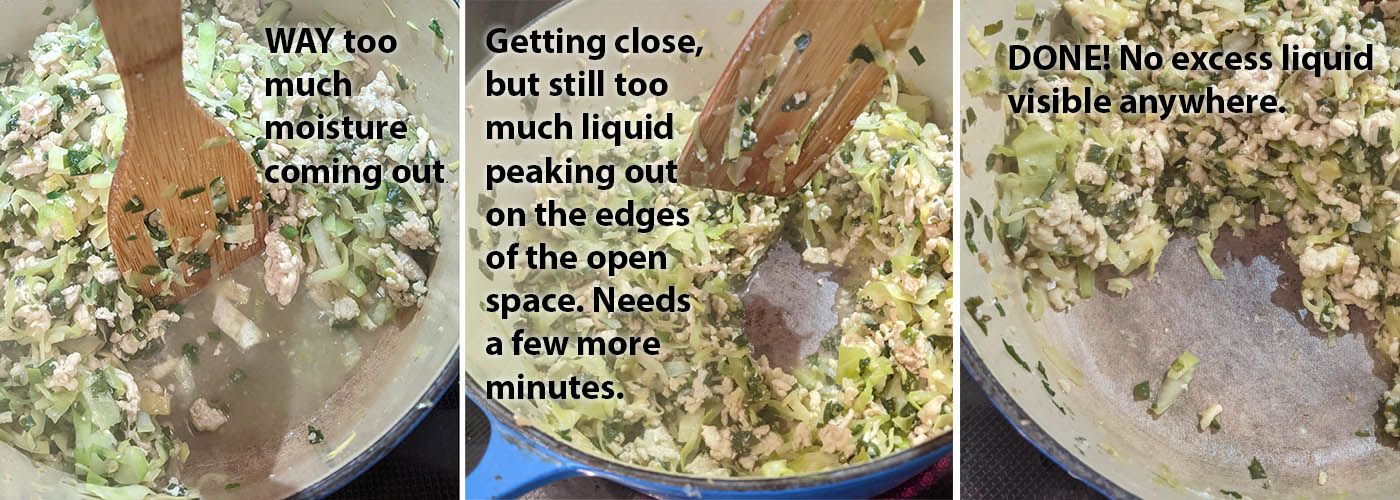
- Add chopped green cabbage. Continue stirring and cooking for another 20 to 35+ minutes, until the amount of liquid in the filling mixture is reduced to almost nothing (see reference photo below). Timing is variable because different types of cabbage give off more or less moisture.
- Test the amount of excess liquid by pushing the filling aside in the pot and slowly counting to 10. If visible liquid comes out into the open spot, even just on the edges, it is too much liquid. Continue cooking until you can push the filling aside, count slowly to 10, and almost zero liquid makes an appearance. See reference photos below.
- Now add in 1 tablespoon of flour and stir the flour into the already-fairly-dry filling mixture. Cook an additional minute or two.
- Turn off heat and leave uncovered, so that ongoing residual steam continues to escape, ensuring the eventual cooled filling mixture is “dry” and does not give off any excess liquid. Allow to cool for at least 30 minutes but up to 1 hour before starting to form the gyoza.
Forming the Gyoza:
Here’s what your workstation will look like:

Items you’ll need at your gyoza-making work station:
- sheet pan (like a cookie sheet) to put the formed gyoza on while you work
- 3 Tablespoons of flour, sprinkled across the cookie sheet
- Your opened container of gyoza wrappers
- Small bowl filled with water
- Your cooled filling
- A medium/small spoon
Cooking the Gyoza:
Here’s a photo of what is needed for cooking – you can try cooking them all at once like me (in two pans simultaneously) but that’s a little intense to manage two pans at once, so I recommend that you do only one cooking pan at a time:
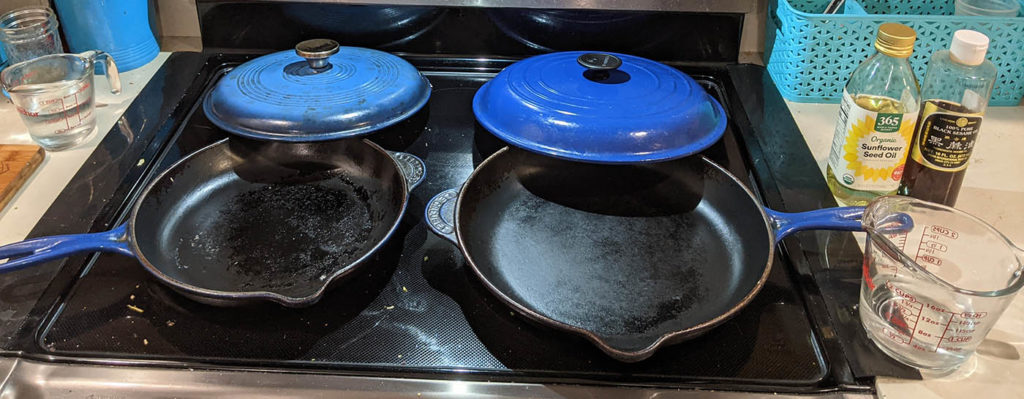
Items you will need for cooking:
- Large Frying Pan (like you would cook a fried egg on) – or a medium size one is fine also.
- Lid that fits the frying pan (a little bit of gaps is okay, like if the fry pan has a lip for pouring, but the lid should fit pretty well)
- 2/3 cup of water
- vegetable oil (enough to coat the bottom of the frying pan)
- sesame oil (about 1 Tablespoon)
Cooking Steps:
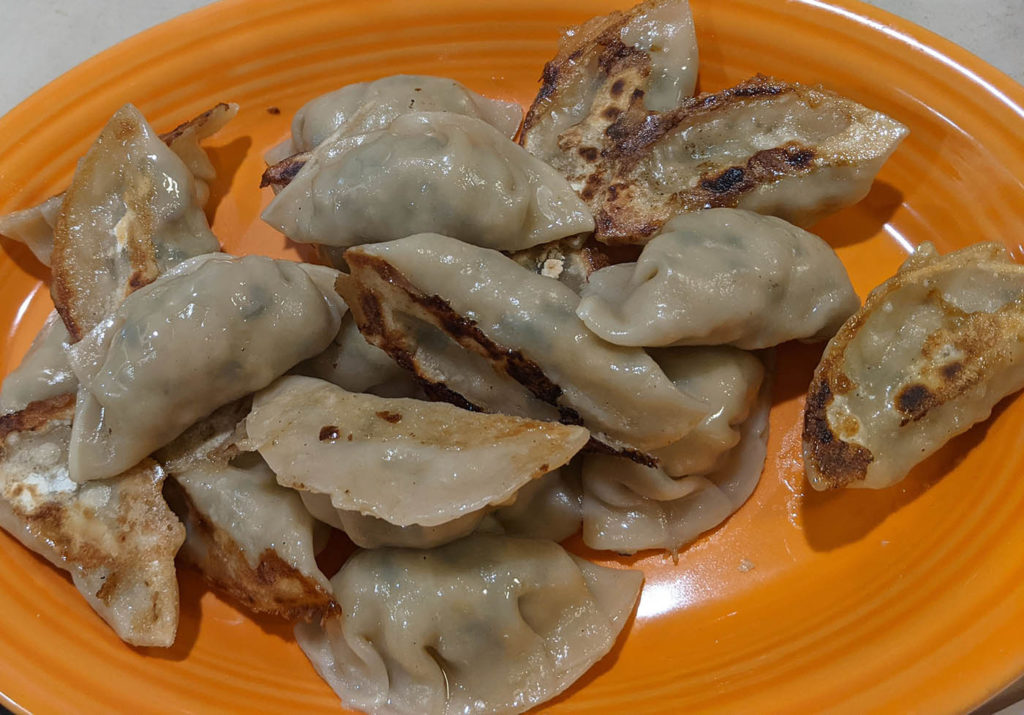
The ideal gyoza should end up appearing freshly steamed on the top side (the side with folds) and a little bit burned/browned/singed on the bottom side (the flat side).
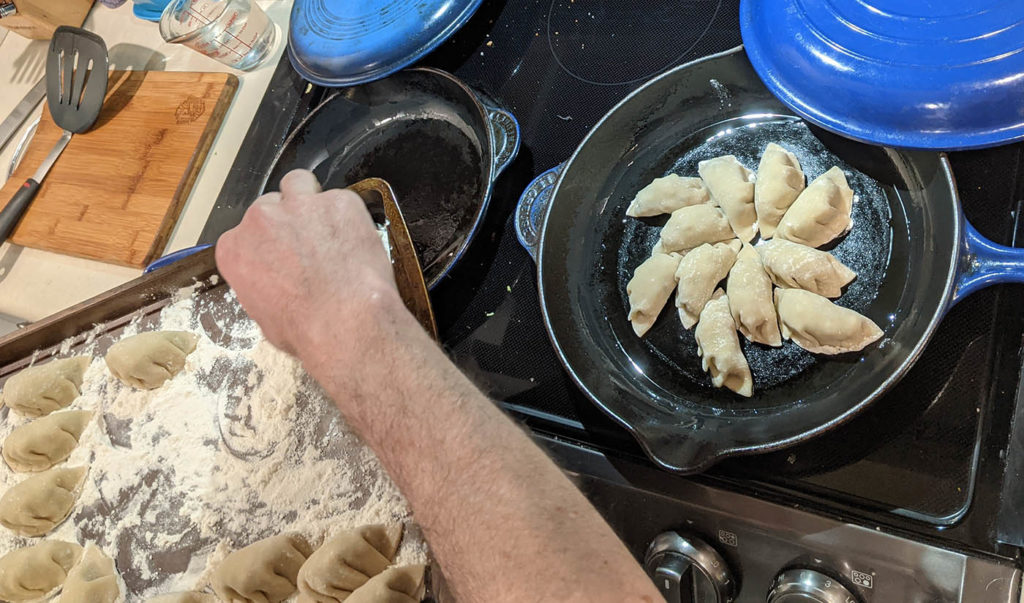
- Oil the frying pan with some vegetable oil – it should be thoroughly oiled, but no excess oil – use around 1/2 Tablespoon. Wipe off excess oil with a paper towel if needed. Pre-heat the oiled pan until it is medium-hot.
- Quickly move your gyoza from the floured cookie sheet into the hot frying pan, arranging them swiftly so that the flat side of every gyoza is fully touching the pan. Make sure a little of the flour from the cookie sheet sticks to the bottom of your gyoza – this will help them to unstick from the pan later. If there are too many gyoza (there will be) you can cook 2 batches, or set up and use two frying pans for the cooking process. Fry for 10 seconds.
- Pour in 2/3 cup water into the pan and cover immediately – set a timer to keep the lid on for 4 minutes (use the 2/3 cup water per pan – if cooking 2 pans simultaneously, put 2/3 cup water into each pan).
- Uncover after your timer ends and cook until almost all of the water has evaporated. DON’T TOUCH OR TRY TO STIR THE GYOZA – the gyoza stay unmoved the entire time in the same spot you initially place them into the pan.
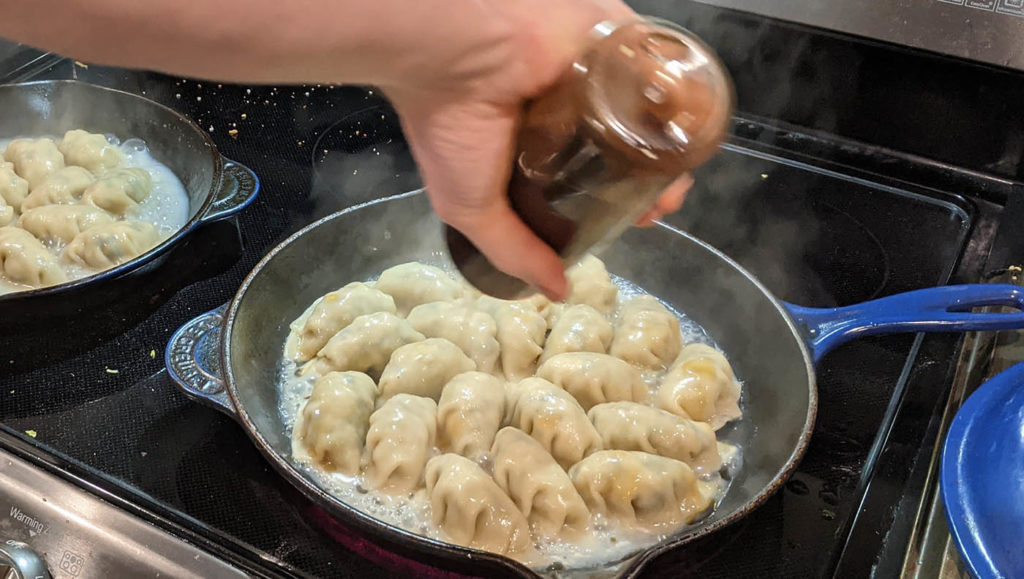
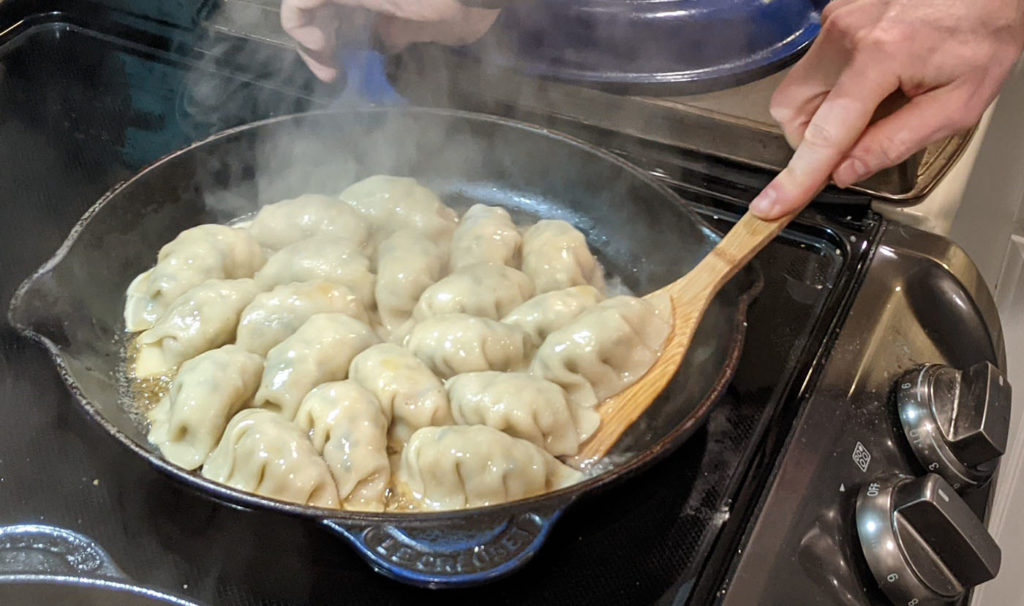
- Drizzle the sesame oil over the gyoza, and begin using a sturdy flat-edge spatula to loosen and separate them from the bottom of the pan. They might stick together and come up as one big mass of fused gyoza – this is normal and appropriate! As they come loose, remove them to a serving platter – they are done!
Photos of cooking!
Pre-heat the oiled pans to fully medium-hot (pans should be piping hot), then start placing the gyoza into the pans like this from your cookie sheet, as many as you can fit such that they are all touching the pan, none stacked:
Fry for 10 seconds:
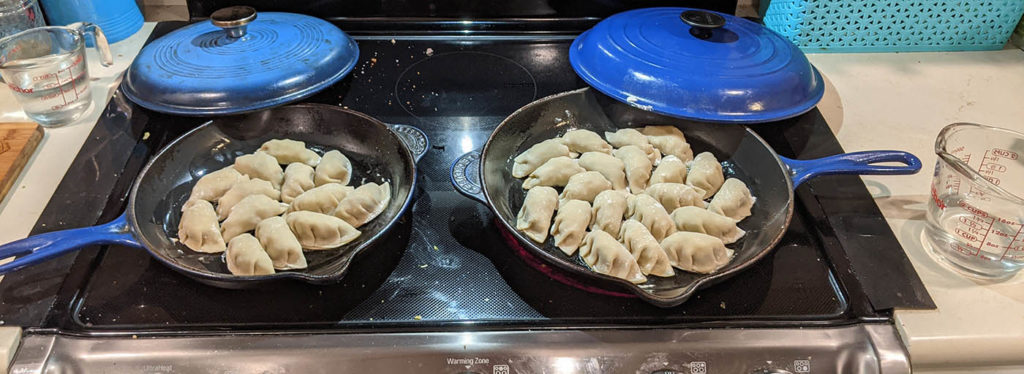
Add 2/3 cup water to each pan:
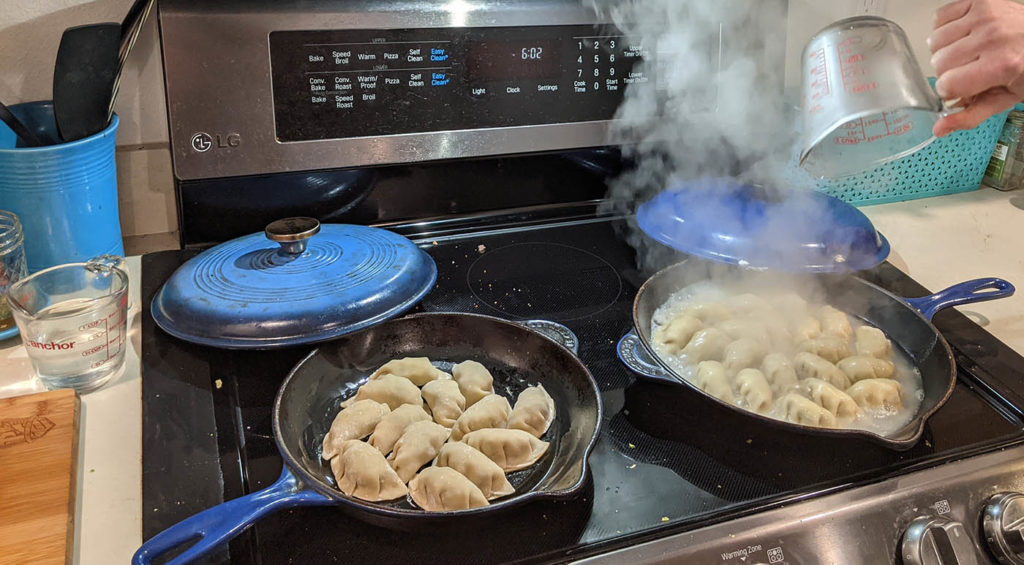
Cover right away and set a timer for 4 minutes:
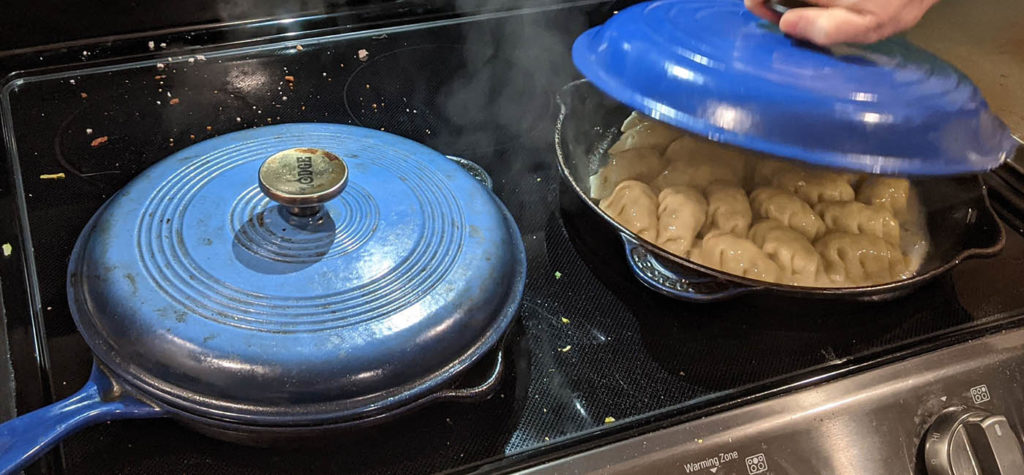
Uncover when timer goes off, and add some sesame oil as you let more water evaporate.
When most (but not quite all) water has evaporated, begin loosening the gyoza with a firm, strong, sturdy spatula, trying to separate them if they are stuck to the pan (they will probably be stuck).
ENJOY your amazing gyoza, delicately steamed on the top, hopefully singed/browned on the bottom, ready for dipping into some soy sauce.
Serve with a small dipping bowl of soy sauce and a small simple side salad of freshly chopped plain green cabbage. Goes will with sushi rice and other traditional side dishes such as a carrot/daikon salad.